
dataTaker
Non-Encrypted SMTP Server For Use With dataTaker And Other Devices
Several of our data logger lines can send emails for both alarming and data transfer. Most of these devices require a non-encrypted SMTP server to send these emails…
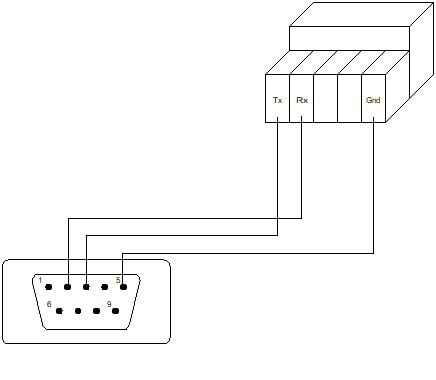
Using a dataTaker Data Logger with a Barcode Scanner
CAS DataLoggers discusses how to set up a dataTaker data logger with a barcode scanner to tag measured data on products coming off manufacturing lines.
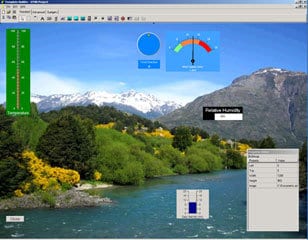
Using the Winlog Lite SCADA Software with a DT80-Range Logger
Winlog Lite SCADA Software Winlog Lite SCADA Software enabling a wide range of application development and online browser-based access. Factory and plant managers can benefit from using a dataTaker DT8X Series Data Logger to create and configure their Winlog Lite projects. Winlog Walkthrough: Prerequisites: Apps Note: ‘Connecting a dataTaker DT80 Range Data Logger to an … Continued
Runtime Monitoring Using a dataTaker Data Logger
For Machine Monitoring, Productivity Assessment & Troubleshooting At CAS DataLoggers, many of our callers want to see how often one or more of their machines are operating and when. This pinpoints machine downtime and can identify poor work productivity, or identify if another cause is at work (power outages, etc.) In our latest Technical Article, … Continued
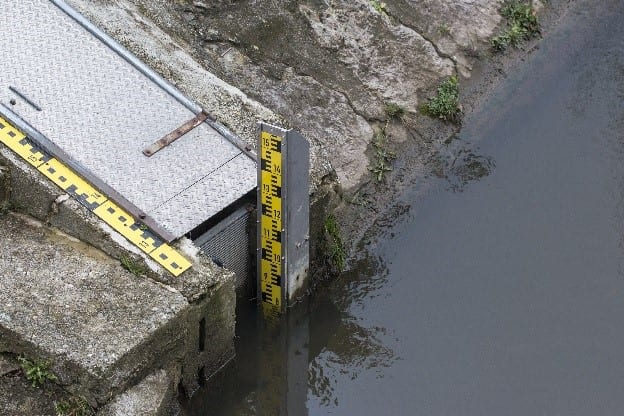
Water Level Monitoring Using a Druck Depth/Level Sensor
In this Tech Article from CAS DataLoggers and dataTaker, we describe the process of connecting the Druck PTX 1830 depth/level sensor to a dataTaker DT8x series data logger. These two components can function as a water level monitoring logger and record depth measurements. The Druck sensor outputs a 4-20mA signal and can be powered by … Continued
Connecting a dataTaker DT80-Range Data Logger to a LAN
Smart Data Loggers Enable Local & Remote Connection Smart data loggers offer several convenient features, not least of which is the ability to connect to local area networks (LANs). In our latest Technical Article, CAS DataLoggers and dataTaker show you how to connect a dataTaker DT80-range intelligent logger to a LAN. It’s an easy way … Continued
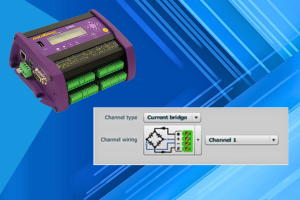
Strain Gauge Measurements With Current
Wheatstone bridge circuits are commonly used to measure the output of strain gauges and other sensors where small changes in resistance need to be detected.
How to Export Data from a dataTaker to a SQLDatabase
SQL Database Allows Users to Parse Data Using Filters At CAS DataLoggers many of our callers want an automated method to transfer the data from a data logger into a SQL database so they can easily track and parse the data using filters, create reports and charts, etc. SQL is much more functional than many … Continued
Securing the dataTaker DT80 Web Services
Series 3 dataTaker Universal DataLoggers Series 3 dataTaker dataloggers are popular for their communications functionality and for their ease of programming using the built-in dEX software. In our latest Technical Article, we show you how to assign password protection to your dataTaker DT80 series logger and how to limit access to its interface if desired. … Continued
Applying Thermocouple Calibration Corrections Yourself
Using the Popular DT80 Series of dataTaker Data Loggers When working with dataloggers, users sometimes have to apply calibration corrections themselves, which can be quite an involved process. This tutorial examines a scenario involving thirty thermocouples connected to a dataTaker device in the bestselling DT80 series of intelligent universal data loggers which needs to have … Continued